
ΜΕΓΑΣ ΑΛΕΞΑΝΔΡΟΣ
 ΜΕΡΑ 1Η
1) INCLINE SMITH PRESS 3XF
2) FLAT DUMBELL PRESS 1XF
3)PEC DECK 3XF
4)INCLINE FLIES 2XF
5)DIPS 1XF
6)CABLE LATERAL RAISES 3XF
7)DUMBELL LATERAL RAISES 3XF
8)TRICEP PUSHDOWN 3XF
9)OVERHEAD TRICEP PUSHDOWN 3XF
10)LEG RAISES 4XF
ΜΕΡΑ 2Η
1)PULL UPS 3XF
2)WIDE GRIP ROWS 3XF
3)CLOSE GRIP LAT PULLDOWN 2XF
4)CHEST SUPPORTED ROWS 2XF
5)REVERSE PEC DECK 4XF
6)BARBELL SHRUGS 3XF
7)PREACHER CURL 3XF
8)HAMMER CABLE CURL 3XF
9)AB CRUNCHES 4XF
ΜΕΡΑ 3Η
1)SMITH SQUAT 3XF
2)RDL 3XF
3)LEG EXTENSION 3XF
4)LEG CURL
5)LEG PRESS 3XF
6)CALF RAISES 4XF
7)LEG RAISES 3XF
8)AB CRUNCHES 3XF
ΜΕΡΑ 4Η
1)PULL UPS 3XF
2)CLOSE GRIP DUMBELL ROWS 3XF
3)INCLINE DUMBELL PRESS 3XF
4)CABLE CROSSOVER 3XF
5)CABLE LATERAL RAISES 4XF
6) TRICEP PUSHDOWN (VBAR) 4XF
7)BAYESIAN CURLS 4XF
8)REVERSE FLIES 4XF
9)LEG RAISES 3XF
10)AB CRUNCHES
ΜΕΡΑ 5Η
1)RDL 3XF
2)HACK SQUAT 3XF
3)LEG CURL 3XF
4)LEG EXTENSION 3XF
5)ABDUCTORS 4XF
6)ADDUCTOS 4XF
7)CALF RAISES 4XF
8)LEG RAISES 3XF
9)CABLE CRUNCHES 3XF
ΠΡΟΧΩΡΗΜΕΝΟΙ

ΜΕΡΑ 1Η
1) INCLINE SMITH PRESS 3XF
2) FLAT DUMBELL PRESS 1XF
3)PEC DECK 3XF
4)INCLINE FLIES 2XF
5)DIPS 1XF
6)CABLE LATERAL RAISES 3XF
7)DUMBELL LATERAL RAISES 3XF
8)TRICEP PUSHDOWN 3XF
9)OVERHEAD TRICEP PUSHDOWN 3XF
10)LEG RAISES 4XF
MEΡΑ 2Η
1)PULL UPS 3XF
2)WIDE GRIP ROWS 3XF
3)CLOSE GRIP LAT PULLDOWN 2XF
4)CHEST SUPPORTED ROWS 2XF
5)REVERSE PEC DECK 4XF
6)BARBELL SHRUGS 3XF
7)PREACHER CURL 3XF
8)HAMMER CABLE CURL 3XF
9)AB CRUNCHES 4XF
ΜΕΡΑ 3Η
1)SMITH SQUAT 3XF
2)RDL 3XF
3)LEG EXTENSION 3XF
4)LEG CURL
5)LEG PRESS 3XF
6)CALF RAISES 4XF
7)LEG RAISES 3XF
8)AB CRUNCHES 3XF
ΑΛΛΙΩΣ !!!
ΜΕΡΑ 1Η
1) INCLINE SMITH PRESS 3XF
2) FLAT DUMBELL PRESS 1XF
3)PEC DECK 3XF
4)INCLINE FLIES 2XF
5)DIPS 1XF
6)CABLE LATERAL RAISES 3XF
7)DUMBELL LATERAL RAISES 3XF
8)TRICEP PUSHDOWN 3XF
9)OVERHEAD TRICEP PUSHDOWN 3XF
10)LEG RAISES 4XF
ΜΕΡΑ 2Η
1)PULL UPS 3XF
2)WIDE GRIP ROWS 3XF
3)CLOSE GRIP LAT PULLDOWN 2XF
4)CHEST SUPPORTED ROWS 2XF
5)REVERSE PEC DECK 4XF
6)BARBELL SHRUGS 3XF
7)PREACHER CURL 3XF
8)HAMMER CABLE CURL 3XF
9)AB CRUNCHES 4XF
ΜΕΡΑ 3Η
1)SMITH SQUAT 3XF
2)RDL 3XF
3)LEG EXTENSION 3XF
4)LEG CURL
5)LEG PRESS 3XF
6)CALF RAISES 4XF
7)LEG RAISES 3XF
8)AB CRUNCHES 3XF
ΜΕΡΑ 4Η
1)PULL UPS 3XF
2)CLOSE GRIP DUMBELL ROWS 3XF
3)INCLINE DUMBELL PRESS 3XF
4)CABLE CROSSOVER 3XF
5)CABLE LATERAL RAISES 4XF
6) TRICEP PUSHDOWN (VBAR) 4XF
7)BAYESIAN CURLS 4XF
8)REVERSE FLIES 4XF
9)LEG RAISES 3XF
10)AB CRUNCHES 3XF
ΑΡΧΑΡΙΟΙ

ΜΕΡΑ 1Η
1)SQUAT 4XF
2)PULL UPS 4XF
3)INCLINE SMITH PRESS 4XF
4)CABLE LATERAL RAISES 4XF
5)REVERSE FLIES 4XF
6)TRICEP PUSHDOWN 4XF
7)CABLE CURLS 4XF
8)LEG RAISES 4XF
MEΡΑ 2Η
1)RDL 4XF
2)WIDE GRIP ROWS 4XF
3)PEC DECK 4XF
4)DUMBELL LATERAL RAISES 4XF
5)FACE PULLS 4XF
6)OVERHEAD TRICEP EXTENSION 4XF
7)HAMMER CURLS 4XF
8)AB CRUNCHES 4XF
VAULT: Κάθε στόχος ,ασφαλής


Η VAULT
- Αποταμιεύει
- Πληρώνει λογαριασμούς
- Ανιχνεύει δαπάνες
- Συμβουλεύει
- Δημιουργεί προσωποποιημένους στόχους
- Αποταμειεύει
- Πληρώνει λογαριασμούς
- Ανιχνεύει δαπάνες
- Δημιουργεί προσωποποιημένους στόχους
- Συμβουλεύει
PPD-Free
Ποιο το πρόβλημα που έρχεται να λύσει η ιδέα σας;
Η γέννηση ενός παιδιού αποτελεί στιγμή μεγάλης τρυφερότητας και γεμίζει χαρά και ευτυχία την ζωή ενός ζευγαριού. Ωστόσο αυτή η τόσο όμορφη στιγμή μπορεί να αφήσει το στίγμα της και να ταλαιπωρήσει την μητέρα ψυχολογικά. Μελέτες δείχνουν ότι μέχρι και 15% των νέων μητέρων βιώνουν την επιλόχειο κατάθλιψη, μια σοβαρή ιατρική κατάσταση που μπορεί να παρουσιαστεί μετά τον τοκετό. Χαρακτηρίζεται από έντονη θλίψη , ενοχές και αίσθημα ανικανότητας ενώ η μητέρα απέχει από δραστηριότητες και ενδιαφέροντα της. Τέλος , ο θυμός και το άγχος διακατέχουν το άτομο και η συνολική κατάσταση δεν επιτρέπει την προσαρμογή της μητέρας στην νέα ρουτίνα και την φροντίδα του νεογνού.
Το πληροφοριακό μας σύστημα, λοιπόν, έρχεται να βοηθήσει αυτές τις πάσχουσες μητέρες, να ενημερώσει τις υπόλοιπες και γενικότερα να σταθεί αρωγός στην αντιμετώπιση αυτής της σοβαρής ψυχολογικής πάθησης.
Ποια ιδέα προτείνετε; δηλαδή μια περιγραφή του τι θα κάνει η λύση σας
Η επίλυση του προβλήματος λοιπόν έγκειται στην ανάπτυξη της εφαρμογής “PPD-Free”.
Μέσα στην εφαρμογή κάθε μητέρα μπορεί να δημιουργήσει το προφίλ της εισάγοντας παράλληλα κάποια στοιχεία που θα βοηθήσουν παρακάτω στην ορθή και στοχευμένη χρήση της εφαρμογής.
Η εφαρμογή περιλαμβάνει πέντε βασικά features που έχουν ως στόχο την:
- γενική πληροφόρηση σχετικά με την κατάσταση
- διάγνωση πάθησης
- επικοινωνία με συμπάσχουσες μητέρες και ειδικούς ψυχοθεραπευτές
- παρουσίαση ορθών προτύπων διατροφής, ύπνου και καθημερινής διαβίωσης
- ειδοποίηση γιατρών και συγγενικών προσώπων σε περίπτωση μη ελεγχόμενης κατάστασης
Η εφαρμογή θα υποστηρίζει , ενημερώνει , ανακουφίζει και καθοδηγεί τις νέες μητέρες. Επίσης θα περιλαμβάνει ένα πρόγραμμα ασκήσεων προς ανακούφιση με καθοδήγηση από ειδικούς . Με απόλυτη ιδιωτικότητα θα υπάρχει ένα section όπου ο χρήστης θα γράφει τις σκέψεις της χωρίς κριτική και θα σημειώνει τι την δυσκολεύει. Θα περιέχει ξεχωριστό mode για τον σύντροφο, ώστε να μπορεί να κατανοήσει ότι κάτι δεν πάει καλά και να την υποστηρίξει χωρίς πίεση. Οι εγκυμονούσες θα ενημερώνονται για τις διαφορές της επιλόχειας κατάθλιψης και της baby blue. Τέλος, θα δίνει πληροφορίες για τα διάφορα συμπτώματα και για τα στάδια της κατάθλιψης χωρίς να αγχώνει τον χρήστη.
Κάθε μητέρα-χρήστης καλείται να απαντά ανά τακτά χρονικά διαστήματα σε ερωτηματολόγια και τεστ από τα οποία προκύπτει η διάγνωση της επιλόχειου κατάθλιψης και μπορεί να παρακολουθείται η κατάσταση της.
Ταυτόχρονα η εφαρμογή περιλαμβάνει ενσωματωμένη πλατφόρμα επικοινωνίας. Μέσα από αυτή οι μητέρες-χρήστες έχουν την δυνατότητα να συνομιλούν με άλλες μητέρες που βρίσκονται στην ιδιά κατάσταση και έτσι βρίσκουν ένα άτομο στο οποίο μπορούν να ανοιχτούν και να εκφραστούν εμπιστευτικά. Η αλληλεπίδραση αυτή μπορεί να τονώσει τις πάσχουσες και να βελτιώσει την κατάσταση τους. Ακόμη μέσα από αυτή την πλατφόρμα οι μητέρες μπορούν να έρθουν σε επαφή με ειδικούς ψυχολόγους οι οποίοι συνεργαζόμενοι με την εφαρμογή και τα δεδομένα που συλλέγει θα συνδράμουν στην θεραπεία μέσω online συνεδρίων.
Η επιλόχειος κατάθλιψη είναι μια κατάσταση στην οποία παίζει καθοριστικό ρόλο ο τρόπος ζωής. Η νέες μητέρες και ειδικότερα εκείνες που βιώνουν την μητρότητα για πρώτη φορά ζουν μέσα μια στρεσογόνα καθημερινότητα έτσι πιθανώς να είναι επιρρεπείς σε έναν φαύλο κύκλο μιας κακής διατροφής και ενός κακού προγράμματος ύπνου που όχι μόνο δεν απαλύνουν αλλά χειροτερεύουν την κατάσταση αυξάνοντας τα επίπεδα άγχους. Μέσω της εφαρμογής μας παρόλα αυτά, θα έχουν στην διάθεσή τους όλες τις πληροφορίες που χρειάζονται ώστε προηγούμενες πάντα από ειδικούς να οδηγηθούν σε έναν πιο υγιεινό τρόπο ζωής. Έτσι, αφού κάθε μητέρα απαντήσει σε ένα ερωτηματολόγιο, η εφαρμογή θα έχει συλλέξει όλες τα πληροφορίες ώστε να παρέχει στην εκάστοτε μητέρα εξατομικευμένο καθημερινό πρόγραμμα γευμάτων ύπνου και πιθανής άσκησης . Το μόνο που μένει είναι αυτές να το ακολουθήσουν και να συμπληρώνουν τις καθημερινές ενημερώσεις που θα έρχονται από την εφαρμογή ώστε να γνωρίζομε σε πιο επίπεδο βρίσκονται και να μπορούμε να κινηθούμε ανάλογα ώστε να φτάσουν στα επιθυμητά επίπεδα.
Η εφαρμογή έπειτα από τις απαντήσεις στα ερωτηματολόγια και τα τεστ συλλέγει διάφορες πληροφορίες για την κρισιμότητα της κατάστασης του χρήστη. Με την βοήθεια ενσωματωμένης τεχνητής νοημοσύνης ανιχνεύει το ποσοστό κινδύνου και αν αυτό είναι σημαντικά υψηλό θέτει σε δράση την λειτουργία ενημέρωσης συγγενών και των ειδικών που παρακολουθούν το άτομο. Κατά την συμπλήρωση των στοιχείων στην δημιουργία του προφίλ η μητέρα εισάγει υποχρεωτικά και ένα τουλάχιστον τηλέφωνο επικοινωνίας ενός κοντινού συγγενικού προσώπου. Έτσι η εφαρμογή ενημερώνει αυτό το πρόσωπο για την κρίσιμη κατάσταση της.
Σε ποιους απευθύνετε η εφαρμογή;
Η εφαρμογή μας απευθύνεται σε ένα ευρύ κοινό. Αν και ο βασικός πελάτης μας είναι οι νέες μητέρες που πάσχουν από επιλόχειο κατάθλιψη, η εφαρμογή μπορεί να χρησιμοποιηθεί και από άτομα τα οποία γνωρίζουν νέες μητέρες και πιστεύουν πως αυτές μπορεί να χρειάζονται την οποιαδήποτε βοήθεια. Η εφαρμογή μας λοιπόν μπορεί να αποτελέσει σανίδα σωτηρίας για τις μητέρες που νιώθουν χαμένες και αβοήθητες αλλά και πυξίδα για τον όποιο τρίτο άτομο τις βλέπει να δυσκολεύονται και θέλει να τους προσφέρει ανακούφιση και ηρεμία αλλά δεν ξέρει πως.

SmartCanteen: Κάνουμε τη φοιτητική λέσχη πιο έξυπνη και πιο εύκολη!
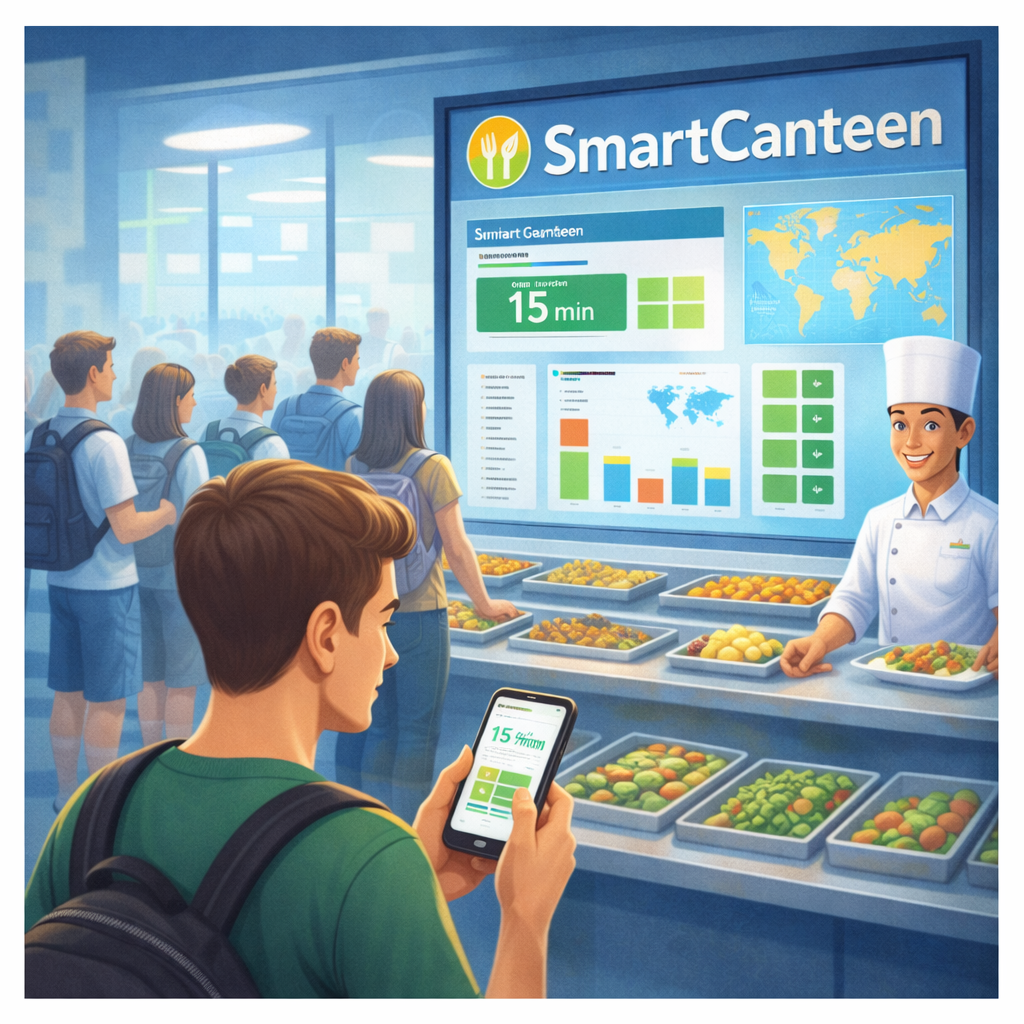
Πόσες φορές έχεις πάει στη λέσχη και βρέθηκες αντιμέτωπος με τεράστιες ουρές, χωρίς να ξέρεις αν αξίζει να περιμένεις;
Το SmartCanteen έρχεται να δώσει λύση σε αυτό το καθημερινό πρόβλημα των φοιτητών.
Το SmartCanteen είναι ένα σύγχρονο πληροφοριακό σύστημα διαχείρισης πανεπιστημιακής λέσχης, το οποίο προσφέρει άμεση και έγκυρη ενημέρωση στους φοιτητές αλλά και πολύτιμα δεδομένα στη διοίκηση.
Τι προσφέρει το SmartCanteen;
• Προβολή ημερήσιου και εβδομαδιαίου μενού
• Ενημέρωση για ώρες αιχμής και χαμηλής κίνησης
• Εκτίμηση χρόνου αναμονής σε πραγματικό χρόνο
• Καταγραφή επισκεψιμότητας ανά ώρα
• Υποστήριξη αποφάσεων για καλύτερη οργάνωση της λέσχης
Με το SmartCanteen μειώνεται η ταλαιπωρία, εξοικονομείται χρόνος και βελτιώνεται η συνολική εμπειρία σίτισης των φοιτητών.
❤️SmartCanteen: γιατί η φοιτητική ζωή αξίζει να είναι πιο οργανωμένη, πιο γρήγορη και πιο έξυπνη.❤️
SmartCanteen
SmartCanteen – Πληροφοριακό Σύστημα Διαχείρισης Πανεπιστημιακής Λέσχης
Το SmartCanteen είναι ένα πληροφοριακό σύστημα που στοχεύει στη βελτίωση της λειτουργίας της πανεπιστημιακής λέσχης και στην αναβάθμιση της εμπειρίας των φοιτητών κατά τη σίτισή τους.
Ένα από τα βασικά προβλήματα που παρατηρούνται στις πανεπιστημιακές λέσχες είναι οι μεγάλες ουρές αναμονής, η έλλειψη ενημέρωσης για το ημερήσιο μενού και η άγνοια σχετικά με τις ώρες αυξημένης ή μειωμένης κίνησης. Το SmartCanteen έρχεται να αντιμετωπίσει αυτά τα προβλήματα προσφέροντας έγκαιρη και αξιόπιστη πληροφόρηση.
Το σύστημα παρέχει:
- Προβολή ημερήσιου και εβδομαδιαίου μενού
- Ενημέρωση για ώρες αιχμής και χαμηλής επισκεψιμότητας
- Εκτίμηση χρόνου αναμονής
- Συλλογή δεδομένων επισκεψιμότητας ανά ώρα
Μέσω αυτών των λειτουργιών, το SmartCanteen συμβάλλει τόσο στη μείωση της ταλαιπωρίας των φοιτητών όσο και στη διευκόλυνση της διοίκησης της λέσχης στη λήψη αποφάσεων, όπως η καλύτερη κατανομή προσωπικού.
Το SmartCanteen απευθύνεται σε φοιτητές, διοικητικό προσωπικό της λέσχης και υπεύθυνους φοιτητικής μέριμνας, με στόχο μια πιο οργανωμένη, αποδοτική και σύγχρονη λειτουργία της πανεπιστημιακής σίτισης.
Δείτε το πιο αναλυτικά σε ένα video

[ Μουσική ]
